
Store to Store or DC Transfer
The following process will outline how to move inventory from one store location to another location in the POS.
- Gather items being pulled/transferred.
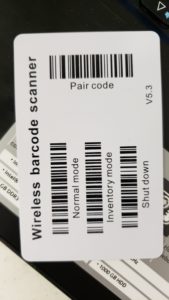
- Using the Bluetooth Scanner, scan the “Clear Data” barcode, then the “Inventory Mode” Barcode

- Now Scan EACH barcode of the product to transfer and load into the box/gaylord as directed.
- Download the “Batch Counter” spreadsheet HERE. This spreadsheet automatically makes the qty a negative.
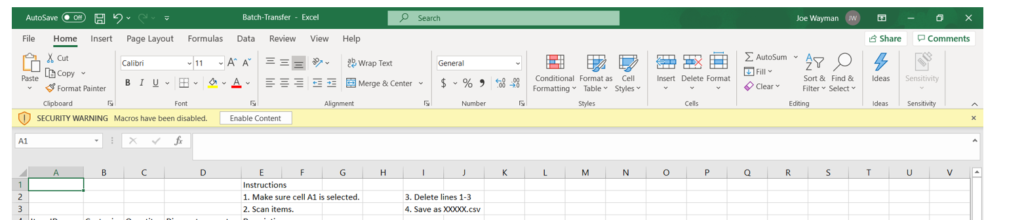
- Be sure to click on Enable Editing at the top in the yellow action bar, and then click on Enable Content at the top in the yellow action bar.
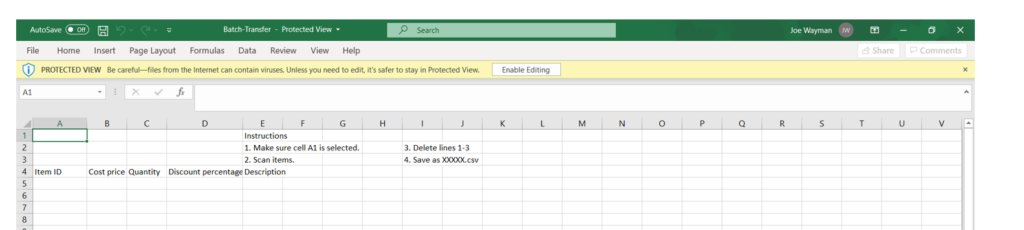
- Place the cursor in Cell A1
- Connect the Bluetooth scanner to the computer, and scan the “Transfer Data” barcode – the scanner will beep and load information, so you do not want to move the cursor or do anything on the computer until the scanner has completed the data transfer.
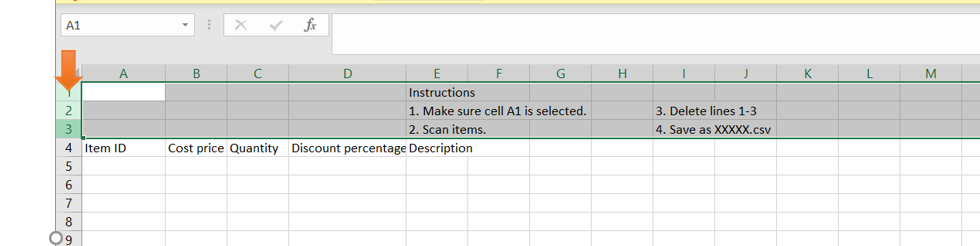
- When all items are downloaded, delete lines 1, 2, and 3 by selecting the numbers on the right, right clicking and select “Delete”. This brings the header line to cell A1.
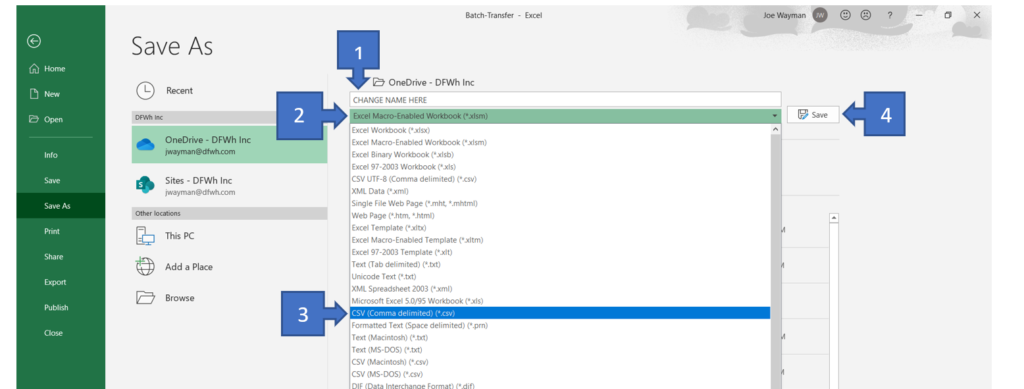
- Save the file – make sure to change the title save as a CSV file.
- In POS go to Receiving and ensure the receiving mode is in “Transfer” – this is the default.

- Click on the Batch Receiving button
- Click on “Choose File” to select the file you just created
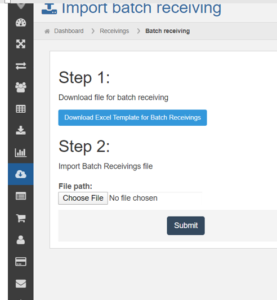
- Locate the file and double click on it so the name of the file will appear next to the Choose file box
- Click submit
- You must put in a location – this is where the product is going to.
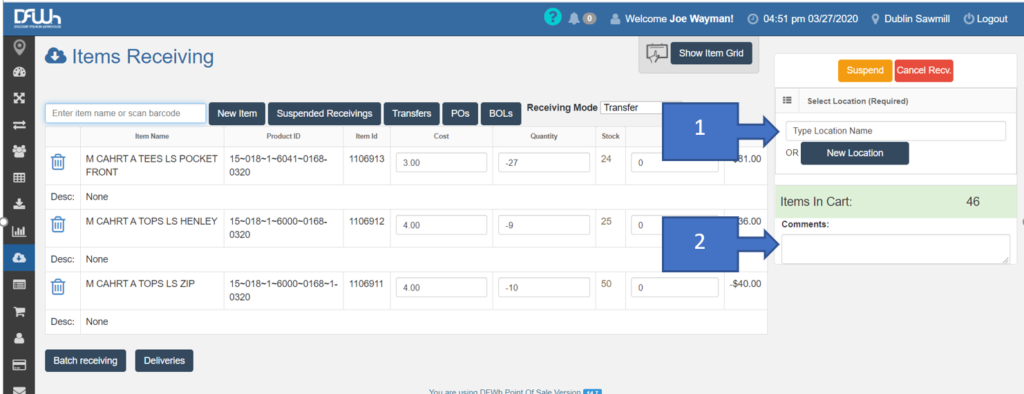
- Fill in the comment section as directed. This lets everyone know why the transfer is taking place. e. store pull, damages, etc
- The qty will show the negative number taking it out of your inventory
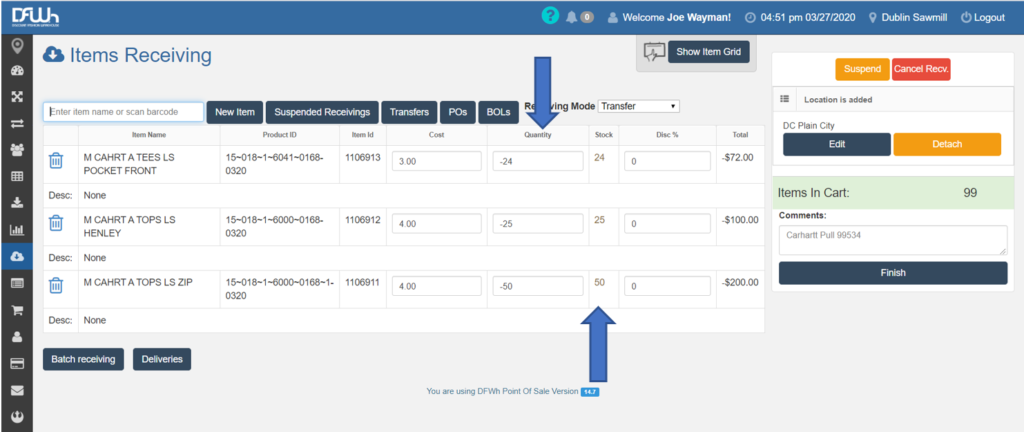
- The stock column shows what is currently in your inventory – the goal is to always have these be opposite -15/15, this balances to 0 which means your inventory is correct for that item
- Once the location is entered the “Finish” button shows up.
- Double check that the mode, location, and comments are correct.
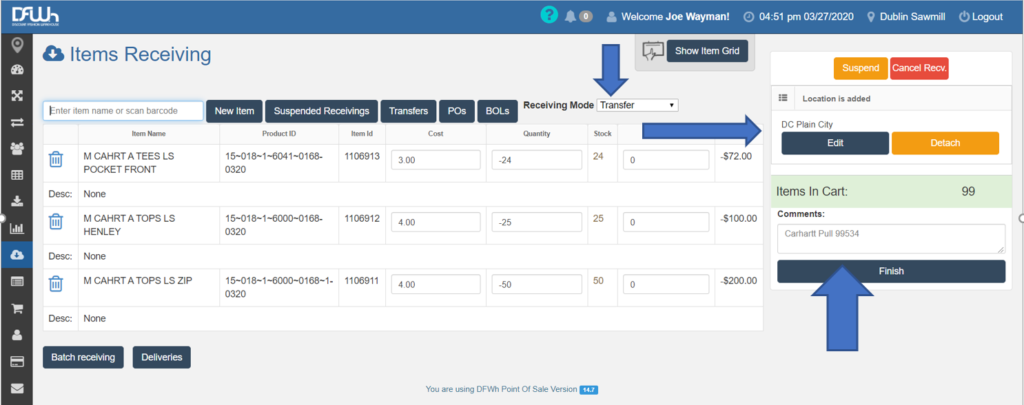
- Click Finish – a note box will appear confirming the action – click yes.
- Print the transfer and securely attach 1 copy to the box/gaylord.
- Once all the transfers are created, notify Inventory@dfwh.com, Traffic@dfwh.com, and your DM team.
- When the driver arrives, you can place the transfers in transit by going into POS>Receivings>Transfers
- Click the “In Transit” button so that the receiving location can receive the transfer(s)